

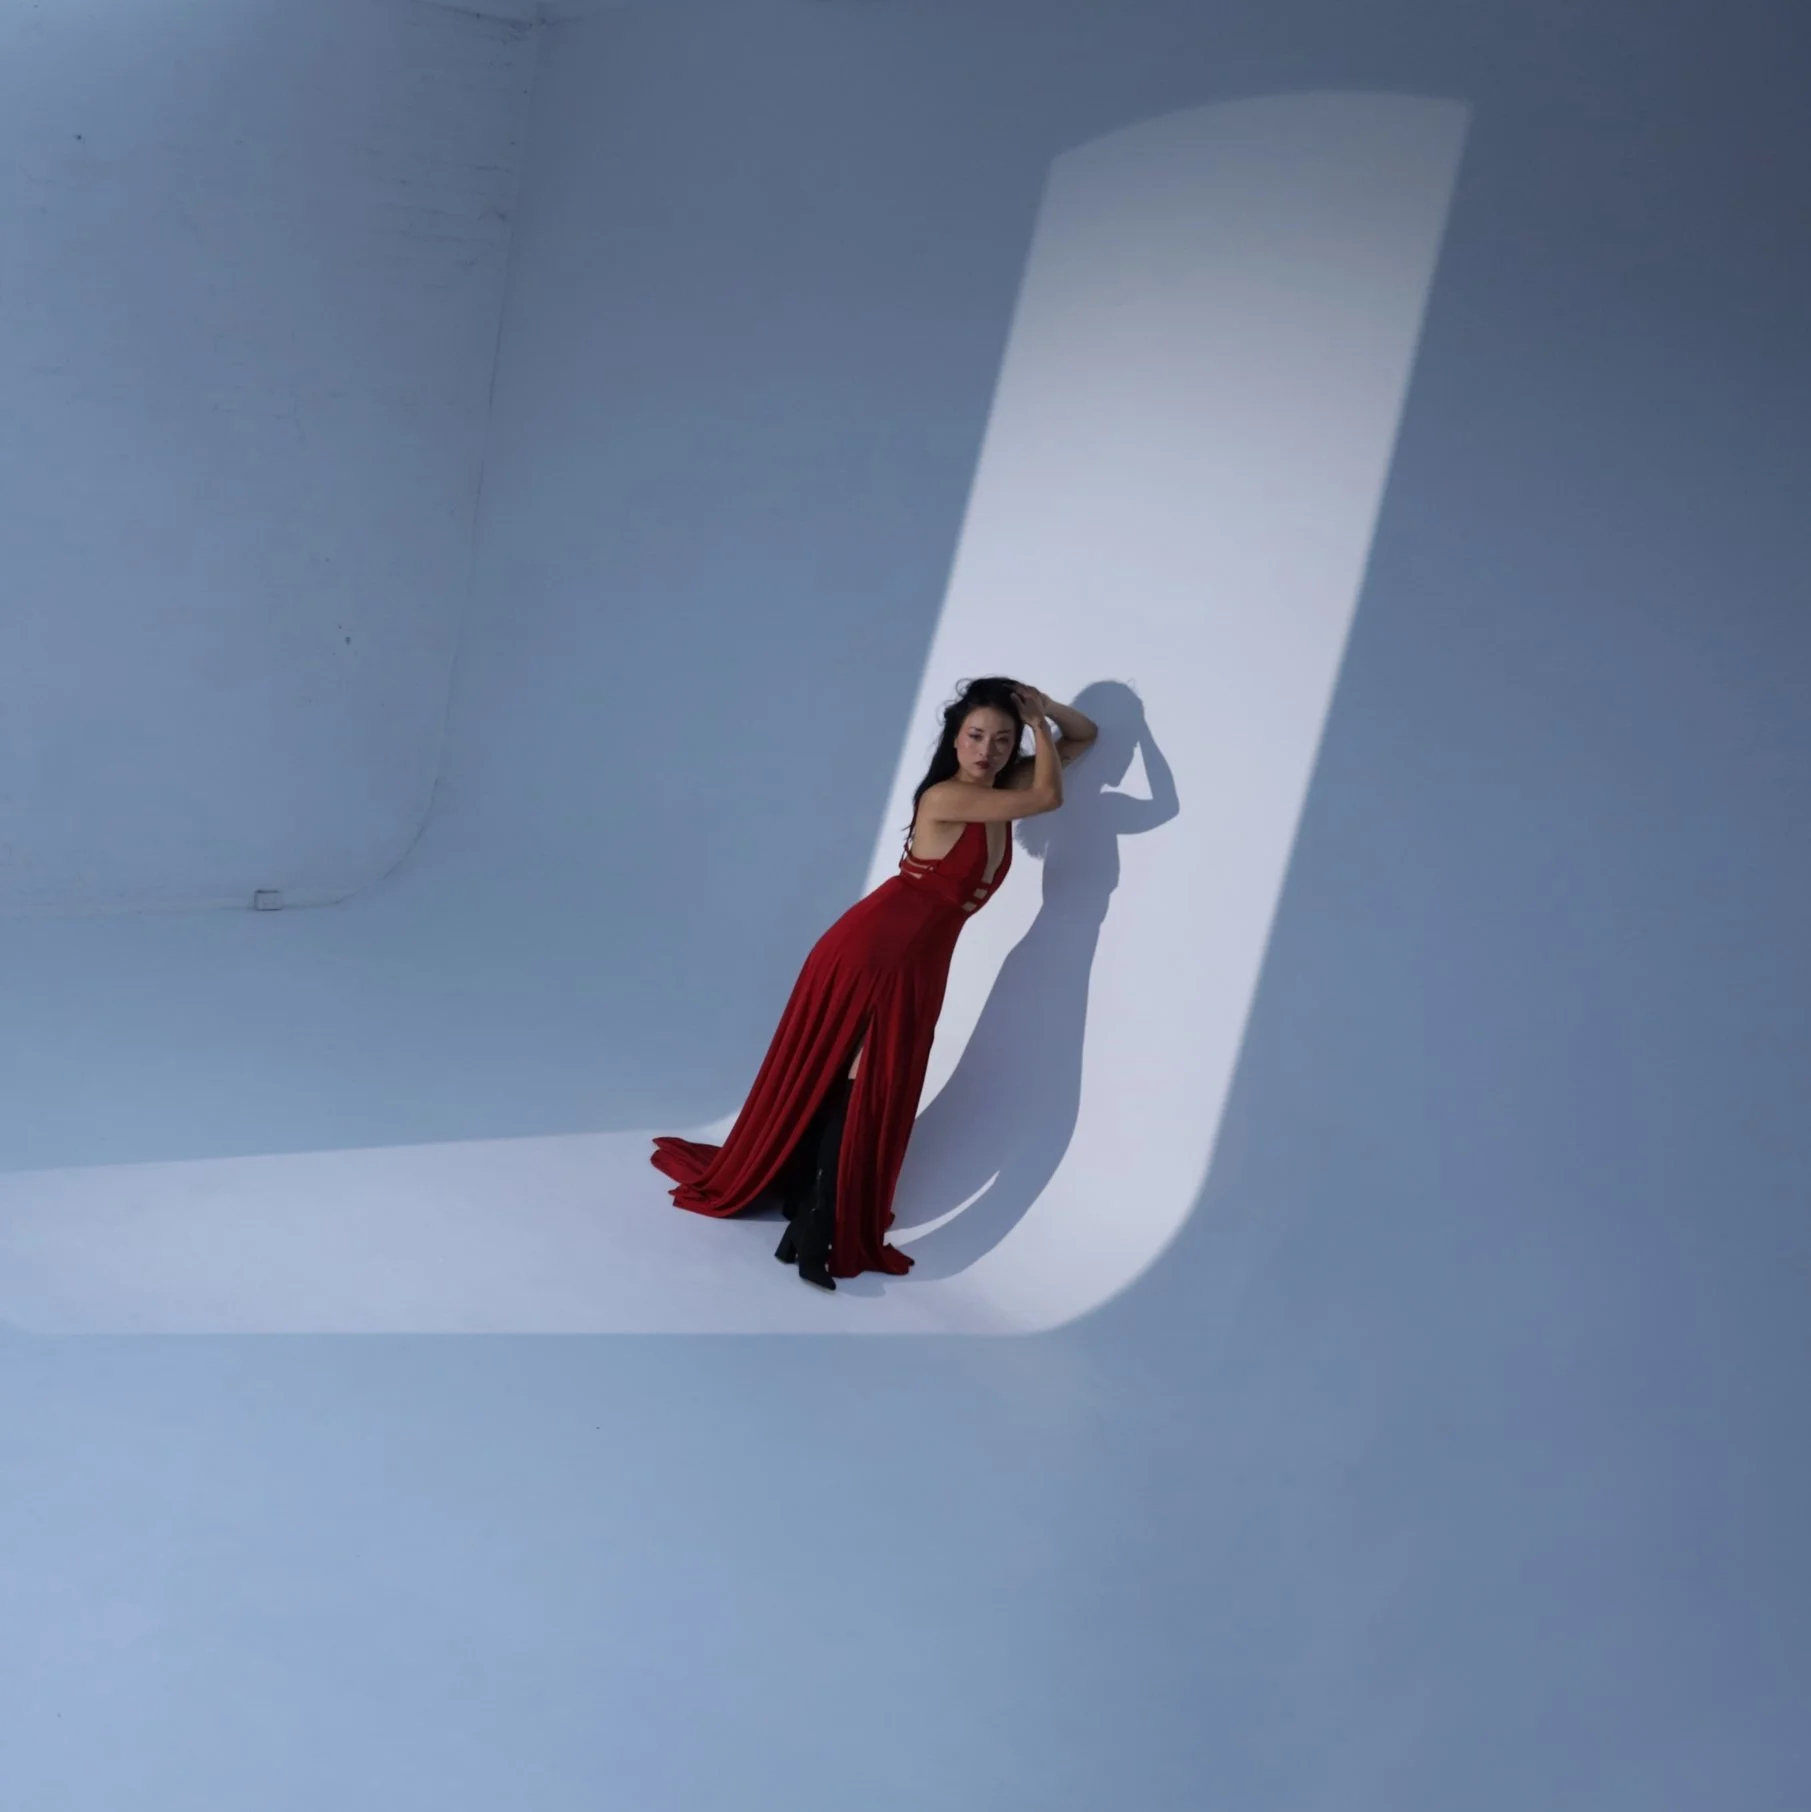
When you’re building your own photography toolkit, it pays to have one or two “signature setups” you can offer. Something that’s not just technically solid, but visually distinctive, an instant drawcard for models looking to build their portfolio. One of my go-to setups for this is by using a projection mount or spotlight mount with a RGB or Bi-Coloured light. You can use the internal barndoors in a variety of ways, and for this, I shaped them into a clean rectangle. Adding this rectangular projection setup to your repertoire gives you more than just another lighting trick, it’s simple, versatile, and delivers a look that stands out in model portfolios, fashion tests, and even brand shoots.

The Setup
This kind of shot works best in a cyclorama studio where you can use the seamless curve of the floor to add depth and elegance to the shot. That said, you can still pull it off on a paper backdrop if that’s what you’ve got. The rectangle of light becomes the hero, so the background doesn’t need to be complicated. I usually add a room light to reduce the contrast, or add a new colour tone, but it looks just as striking kept crisp and minimal.

Why It Works for Model Portfolios
Framing the model inside that rectangular beam instantly gives the shot a bold, graphic feel. It naturally highlights the model’s figure and helps create strong, long lines in the posing and silhouette of the styling, flattering both the model and what they’re wearing. That’s why it works so well for clothing brands too: the outfits look sharp and intentional, but the overall vibe still feels polished and high-fashion.
Another big win is how versatile it is with different lights. Stick to regular lighting for something clean and minimalistic, or add Bi-Colour to play with cool & warm tones. Bi-Colour helps boost the sophistication of the shot, using cool icy blues to highlight elegance, or warm oranges to highlight luxury (think Silver vs Gold). Or use a RGB light to completely transform the look, creating a seemingly endless amount of options, for creative and edgy looks. Teal and orange for that cinematic punch, pinks and purples for a dreamy editorial mood, or even bold primaries if you want to make a strong statement.

Process: How to Recreate This Look
Step 1.
Studio Setup (Cyclorama vs Paper)
This setup really comes alive in a cyclorama studio. The seamless floor curve picks up the projection light beautifully, creating that curved, three-dimensional feel. If you don’t have access to a cyc, a paper backdrop works too, white is the closest match for that seamless look, or you can go with coloured rolls, giving you you a striking pop if that’s what you’re after. Just keep in mind that with paper you’ll be more limited in terms of angles, side shots, for example, won’t have the same effect.
No matter where you’re shooting, try to work in as close to blackout conditions as possible. Controlling the darks will let you decide whether you want them crisp and punchy, or softer and more atmospheric.

Tip: If using paper, make sure the curve where the horizontal and vertical sides meet is a smooth, even curve. This will help mimic that cyclorama feel.
Step 2.
Creating the Rectangle (Projection Mount)
Using a projection mount (or a spotlight mount with internal barndoors), shape the beam into a neat rectangle with the side doors. For extra precision, bring in the top and bottom doors to sharpen the edges, or leave them slightly curved if you prefer a softer, more organic frame.
In this setup, that shaped light becomes your Key, delivering a bold, graphic point of focus with strong visual control.
If you don’t have a projection mount, you can improvise with flags or polyboards to block and shape the light. It works in a pinch, but you’ll lose a lot of finesse, the falloff, shadow quality, and crispness of the edges won’t be nearly as controlled. That’s why I recommend adding a projection mount to your kit, even an inexpensive one. Once you start exploring the range of looks it can create, you’ll find it quickly becomes a favourite tool.
Tip: Make sure the edges of the projection are crisp if you want a bold, graphic feel, or slightly soften them for a more forgiving look on skin.
Step 3.
Add a Room Light (Optional)
To make this setup more versatile and unlock a wider range of looks from the same layout, I recommend adding a Bi-Colour or, ideally, an RGB “Room Light.” Use something big and powerful with a large softbox, and place it off to the side of the room, angled toward the centre of the ceiling. This creates a broad, super-soft wash of light that fills the space without leaving hot spots.

You can keep it subtle by just lifting the shadows and reducing contrast between your Key and the blacks, or push it further by tinting the dark areas with tone. And if you want to go all in, introduce bold colours for a more dynamic, energetic atmosphere in your images.
Tip: You can use this room light to create harmony with the tones used in your key light, or to create contrast, just make sure you remember your colour theory, and avoid making the image look muddy.
Step 4.
Working the angles (Play with your camera placement)
My favourite thing about this setup, and the main reason I encourage people to add to their toolkit, is the versatility of the layout. By simply moving your light height or camera angle to high or low angle, you create completely different feels and emotions from the image, without the need to change anything else.
You can also get a completely different image by moving your camera to parallel to the back wall and shooting the model on the side. A white wall will help create a bounce to ensure their face isn’t too shadowed, and the stability of the wall can open your model up to different kinds of posing, and will always look super stunning!
Tip: If using a paper backdrop, you won’t be able to get the same kind of looks for the side shot, but you can still play with angles of the light or camera.

Step 5.
Directing the Pose (Lines and Shapes)
Since this setup already gives you strong geometric lines, guide your model toward poses that bring in curves and organic shapes to balance the frame. The contrast between the rigid rectangle of the light and the flow of the body is what makes the image pop.
Think long, sweeping curves, extended arms, pushed-out hips, clean silhouettes, or bold, dynamic shapes that highlight the body’s natural lines.
Small shifts can completely transform the mood: placing weight on one leg, twisting into an almost uncomfortable angle, or leaning the upper body into the wall. Each choice breaks away from the structure of the light and introduces something unexpected.
Tip: Help guide your model to know where the edges of the light are, if their limbs cross outside the rectangle, they might start to look amputated, so ensure you help the model posing to keep them positioned the best for the image.
Why You Should Add It to Your Toolkit
Having a go-to lighting setup like this does two things: it makes your work instantly recognisable, and it positions you as a photographer who offers more than just “standard headshots.” When a model sees this kind of image in your portfolio, they’ll know you’re someone who can give them something creative and portfolio-worthy.
With just one projection-mounted light, you’ve got a setup that looks high-end, works across multiple genres, and delivers results that models and brands are drawn to.


Gear List
-
Cyclorama, Wall or White Seamless Paper Backdrop
Position: Backdrop
Role: Smooth, black surface to light with custom colour
Colour: White
Why: Essential for smooth, consistent colour coverage
-
Can use similar size RGB Monolight.
Modifier: Nanlite 120cm Rapid Parabolic Soft Box
Position: To the side, aimed at the centre of the ceiling
Role: Fill the room with coloured light
Colour: Teal at approx. H: 180 / B: 60% / S: 100%
Why: Creates bright room filling colour without hot spotting.
-
Can use similar size RGB or Bi-Colour monolight
Modifier: Nanlite PJ-FZ60 Projection Attachment
Position: Close to wall, hitting at a long distorted angle.
Colour: Warm White at approx. 100K / B: 100%
Why: Add a dramatic shard to the wall and Model
-
Aperture: f/2.8
ISO: 500
Shutter Speed: 1/250s
-
Standard Zoom lens with focal depth of 70mm up to 200mm
Image shot at approx. 50mm


Summarised (I Ain’t Readin’ All That):
Create an arresting product offering with a variety of posibilities for photo outputs, with one simple set up, giving you a recognisable offering that models and clients can book you for.
Just one projection mount or spotlight modifier and maybe an additional ‘room light’ to create striking and sexy portraits.
What is a photographer's toolkit?
When photographers talk about a “toolkit of setups”, they usually mean a collection of reliable, repeatable lighting and shooting arrangements they can pull out at any time, and create a variety of images with. Think of it like a chef’s go-to recipes, you don’t have to reinvent the wheel every shoot; you’ve got a set of tried-and-tested setups that work in different situations.
In short, a photographer’s toolkit of setups is a personal library of lighting, modifiers, camera angles, and posing combos that you can reliably use, adapt, and scale depending on the shoot.
Update as you grow
Your toolkit doesn’t have to be fixed forever. As your style shifts or you start working with new gear, or in new industries you’ll naturally evolve your go-to setups.
Always look to evolve your setups and create more diverse and interesting imagery, but never forget your old favourites. They’re always fun to pull back out to remind yourself of why you loved them in the past.
